
- Stitch Family: Loop Stitch Family
- Difficulty Level: Beginner
- Time to Learn: 5 – 7 minutes
- Primary Uses: Outlining, floral stems, creating textured borders, lettering, and filling curved shapes.
The Chain Stitch is one of the most versatile and popular hand embroidery stitches. It gets its name because it forms a continuous series of looped stitches that resemble the links of a metal chain. By anchoring each loop with the next, you create a flexible, rope-like line that handles curves and turns exceptionally well.
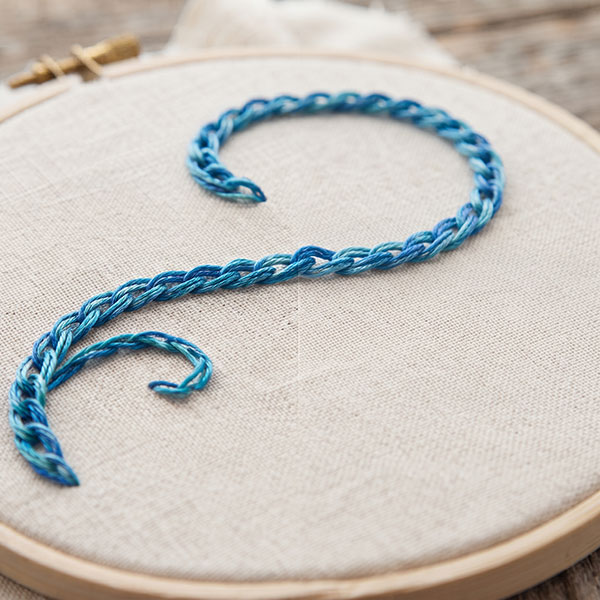
How to Do a Basic Hand Chain Stitch
- Bring the needle up through the back of the fabric to the front at your starting point.
- Reinsert the needle back down into the exact same hole (or right next to it) to form a small loop on top of the fabric.
- Bring the needle up a short stitch length forward, making sure the needle point comes up through the center of the loop you just made.
- Pull gently so the loop hugs the thread, creating your first “link” without pulling too tight.
- Repeat the process by reentering the hole inside your previous loop to form continuous links, and anchor the final stitch with a tiny securing stitch over the last loop.
Pro-Tips & Variations
- Tension Control: Keep your tension even. If you pull too tight, the fabric will pucker; if you pull too loose, the loops will look sloppy.
- Lazy Daisy Variation: By working a single chain stitch anchored with a tiny straight stitch at the tip, you can create standalone flower petals and leaves (also known as the Detached Chain Stitch).
Leave a Reply